Using Databricks notebooks on their platform is not so bad, but once you want to access the super power of Spark from your local RStudio, you’ve got to prepare yoruself for some installation hell. This post augments the Databricks official documentation and spells out the steps that tripped me up.
Requirements
Why is this so painful? Because you have to carefully check that you have the correct versions of each of the following programs:
- Databricks
- Spark
- Scala
- Python 3.5+ (needs to match cluster) – I checked that I had 3.7 using
which -a python3.7in the terminal (more details for Mac here) - Java 8!!
The versions need to match your cluster set-up, and they also need to match each other. Read the requirements section very carefully.
You can check your cluster configurations on Databricks by clicking Clusters –> Accessible by me –> Name of the cluster (or + Create cluster).
Occasionally there is a message that you should set your cluster configurations to spark.databricks.service.server.enabled true. Since I used a newer Databricks version, I don’t think it was necessary but it didn’t hurt. I set it in the cluster’s Advanced Options.
Disclaimer: I did all this on a Mac and have no idea if any of this works on Windows.
Step 0: install Java 8
About a year ago, I gave up partway through a workshop because I couldn’t understand why I had to download Java 8 when I had Java 11. Turns out, there is no escape from this obstacle if you want to use Spark from RStudio (at least with this Spark version).
To install, follow these instructions on StackOverflow or my tweaked version below.
- Check to see if you have Java 8 by running
/usr/libexec/java_home -Vin the terminal. If you have it already, skip to step 4. Note: the version number should read something like 1.8.* - Download Java 8 from https://www.oracle.com/java/technologies/javase/javase-jdk8-downloads.html (I had to register to download)
- Run
/usr/libexec/java_home -Vin the terminal again to check that the install worked - Add the
JAVA_HOMEvariable to your bash profile and your .Renviron file. To do so, either run the code below in the terminal OR (if you run into problems…)
echo "export JAVA_HOME=$(/usr/libexec/java_home -v 1.8)" >> $HOME/.bash_profile
echo "JAVA_HOME='$(/usr/libexec/java_home -v 1.8)'" >> $HOME/.Renviron
To add manually:
- Open your bash profile (
open ~/.bash_profilein the terminal) and addexport JAVA_HOME=$(/usr/libexec/java_home -v 1.8)on a new line - Open your .Renviron file (
open ~/.Renviron) and addJAVA_HOME='/Library/Java/JavaVirtualMachines/adoptopenjdk-8.jdk/Contents/Home'(replace the path with the output of/usr/libexec/java_home -v 1.8if your path is different)
Step 1: Install the client
- If you have it installed already, uninstall PySpark:
pip uninstall pyspark - Install the Databricks Connect client:
pip install -U databricks-connect==6.4.*(make sure you get your Databricks version right!)
Step 2: Configure connection properties
You will need the following configuration properties:
- URL: https://yourgroupname.cloud.databricks.com/
- User token: get your personal access token with these instructions
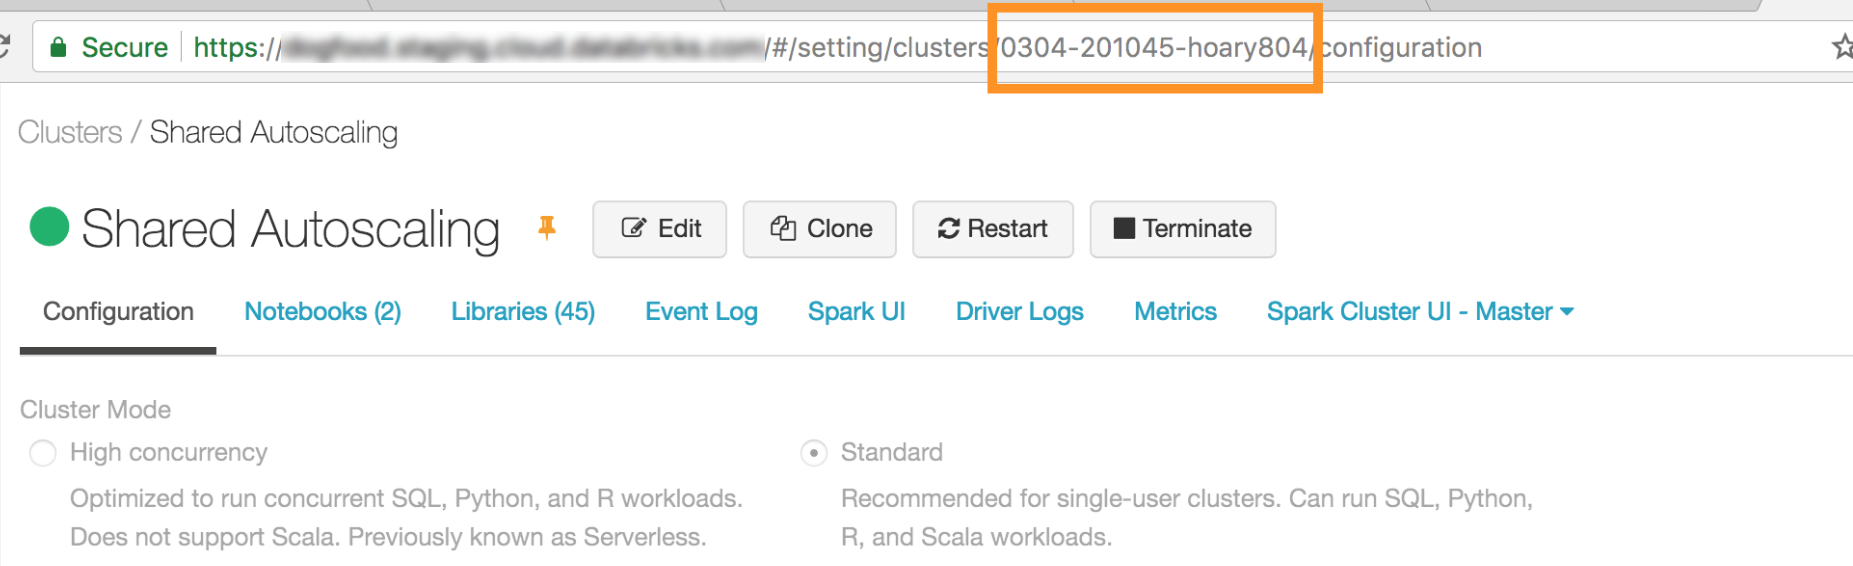
- Cluster ID (see image below from the official docs)
- Org ID: ### (don’t remember how I got this but it was part of the process)
- Port: 15001
- Run
databricks-connect configureand follow the instructions, filling in the configuration properties as written above - Not 100% sure if this is necessary at this stage but eventually you’ll want to set SPARK_HOME in your bash profile & .Renviron files. Use
databricks-connect get-spark-hometo get the appropriate path.
echo "export SPARK_HOME='/usr/local/lib/python3.7/site-packages/pyspark'" >> $HOME/.bash_profile
echo "SPARK_HOME='/usr/local/lib/python3.7/site-packages/pyspark'" >> $HOME/.Renviron
(Use the manual method from above if you run into problems.)
- Run
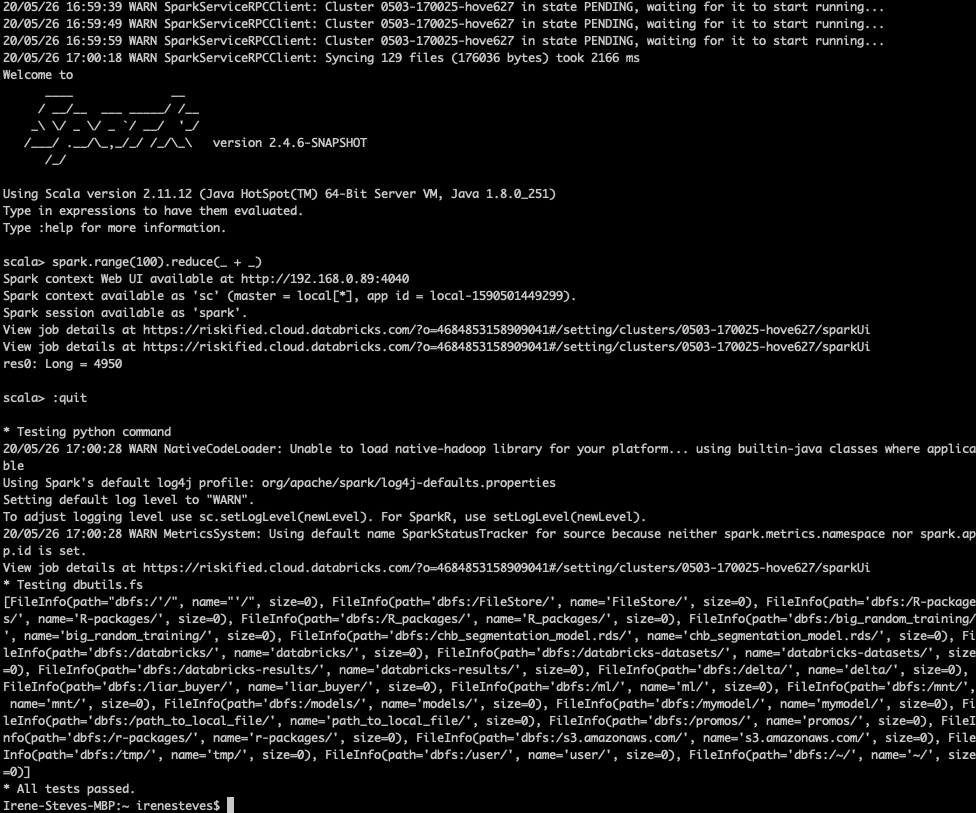
databricks-connect testto check that the connection worked – if it worked, you’ll eventually get the message,All tests passed.. Try restarting your computer & running again if you have problems. This worked for me! Initially, I got the error message below, but it went away when I tried a week later (probably because I had restarted my computer):
Testing scala command Could not find valid SPARK_HOME while searching [‘/Users/irenesteves’, ‘/usr/local/bin’]
Step 3: set up in R
There is RStudio set-up information in the Databricks documentation, but I found a bit of extra information in the RStudio documentation pages.
To start, you need to install sparklyr:
# Install sparklyr if you don't already have it
# install.packages("sparklyr")

# Check to see if Spark has already been succesfully installed locally
sparklyr::spark_install_find()

# If not, install Spark locally
sparklyr::spark_install()
If you don’t have the JAVA_HOME and SPARK_HOME variables set in your .Renviron file yet, now is the time to do it (run the echo commands above or manually edit them using usethis::edit_r_environ()). Once they’re set, you should be able to run the following anytime to get connected in R:
library(tidyverse)
library(sparklyr)
library(dbplyr)

sc <- spark_connect(method = "databricks")
You should be able to see all the Databricks tables in the Connections pane:
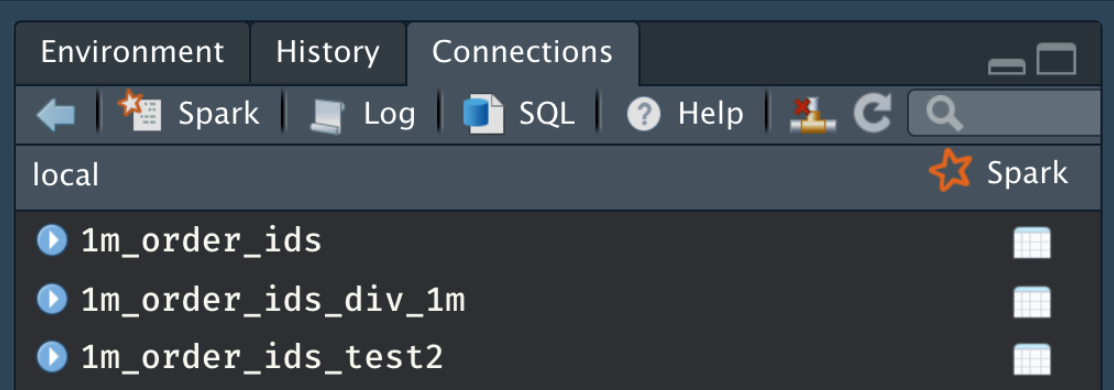
To see if you can actually work with the tables, test one out:
fi <- tbl(sc, "fireincidents")
# run `fi` to preview the "lazy" table

fi %>% count(`Ignition Cause`)
# you can use `collect()` to bring the data into R -- it can be heavy!
When you finish using your connection, simply disconnect with spark_disconnect(sc).
Conclusion
It’s a long and arduous process that requires lots of googling and stack-overflowing, but hopefully this post saved you a bit of time and pain.